quilt update

a blue and gray quilt draped across a gray couch.

I’ve got enough of the quilting done from the centre outward that I feel confident taking it off the frame and doing the rest of the quilting with it across my lap on the couch. Much better for my back and also for my eyes, as the lighting in my sewing room is extremely unworkable. It’s lovely to be able to use it and stitch on it at the same time, and I’ve even taken my first nap under it.

I decided against using multiple colours for the quilting, as the indigo and walnut dyed sashiko thread completely disappear against the quilt fabric. I’ll be doing the whole thing in the navy blue. It’s the only colour in the quilt that I didn’t make myself but I like the high contrast.

a blurred view of a tortoiseshell cat hiding under a quilt frame.

Skeeter thought the quilting frame was a pretty good blanket fort.

wip wednesday

close up of the texture of knitted green wool.

Last winter I made a few aborted attempts at knitting Norah Gaughan’s Ginsberg shrug/cardigan from Brooklyn Tweed (pattern link: Ginsberg Cardigan by Norah Gaughan), trying to find the right mix of different yarns held double because I don’t like buying materials and never have enough yarn for anything. Every attempt fell short and I gave up when spring came.

For the past fifteen years or more I’ve only worn cardigans, but I woke up one day and realised they weren’t really working for me the way they used to and I started unraveling all of my hand knitted cardigans and reknitting them into big sloppy pullovers with lots of ease. I still get violently hot at the drop of a hat, and being able to strip off in seconds was a real benefit with cardigans, but I like my belly swaddled and having a cardigan done up makes it actually slower to strip off than a huge sweatshirt. Right now the slatternly huge pullover falling off the shoulders suits me better.

I had knit up this green handspun merino/silk blend, Peppercorns colourway from The Fibre Garden (shop link: The Fibre Garden) along with a coordinating handspun of blended olive, navy, turquoise, and white) into a gorgeous Isabel Kramer cardigan that you’ll probably hate to hear I’ve unraveled, because it was really very lovely. But I never wore it and it was too fancy for me and came too close to my throat. Fast forward a few years and this glorious green yarn is finally about to live its best life as this big squishy cardigan I hope never to want to unravel (but you never know; life is long). Yes, I know, I just said I don’t like cardigans anymore but this one is huge enough to keep my belly cozy and also, has no fastenings. Perfect for those cold day hot flashes!

The merino/silk is held double with some truly terrible merino I accidentally fulled in the mordant bath and then went ahead and dyed and spun anyway even though the spinning was torture, and it’s clumpy, uneven and has zero sheen. It was all shades of gold and tan dyed from things in my garden and I overdyed it with indigo and held double with this nicer yarn you can’t tell at all how awful it is. I ran out of that just 20 rows from the end of the front panels and switched to holding the merino/silk with that colour blend it had been paired with in the original cardigan, which I’d intended to do for the ribbed borders anyway and the change is subtle enough that I doubt anyone will ever notice the colour changes a few inches higher on the front. Not that it’s any big deal if they do.

You don’t get pictures of any of this because the lighting in my sewing room is dim and unworkable. This sweater is mere days from the finish line, right in time for the return of sweater weather.

the kitchenening, part six

view through an opening in the wall of an unfinished room, with bright light coming in through a window beyond.

And just like that, where for a hundred and twelve years has stood a doorway, there is now a wall.

view through an opening in an unfinished wall, into a room beyond that is under construction, with construction tools in the foreground.

Here’s the view from the living room side, which has had a layer of new drywall added on top of the crumbling original plaster. After all this is finished, we are going to install built-in bookshelves across this wall, right up to the opening, with space built into the centre of it to house our stereo and record cleaning equipment.

The opening will stay as-is for now, with tile around it on the kitchen side. Later on we’re planning to make a grillework panel to fill it. We think we’ve settled on this classic breeze block pattern, seen here on a building I photographed in Milwaukee in 2013:

the façade of a building with glass doors and windows on the left and breeze block on the right, with a fire hydrant in front.

Or this similar pattern, shown in a more domestic context on the front cover of Mrs. Mills Party Pieces:

The cover of a record entitled "Mrs. Mills Party Pieces", depicting a woman seated at a festive table laden with food and wine.

Please note the roast turkey on Mrs. Mills’ party table has the name “ROBERTO” written on it in what looks like mayonnaise from a squeeze bottle. Mrs. Mills really knew how to party.

BONUS, because I am a huge fan of Mrs. Mills: here’s a BBC documentary about Mrs. Mills that you can watch for free on Youtube: Let’s Have a Party: The Piano Genius of Mrs. Mills

the kitchenening, part five

the corner of a room under construction, with new drywall and a plastic draped doorway

We have walls. That unfinished mess of uneven drywall and original plaster, left behind when we had the addition (visible through that plastic draped doorway) put on, is finally about to be integrated into a seamless wall again.

the corner of a room under construction, with a plywood covered doorway and new drywall

Someday we won’t remember there was ever fake brick here. This corner is where the pantry cupboard will go, and the built in bench (next to the plywood covered doorway).

looking through the doorway of a room under construction

Farewell, elegantly rounded doorway that we loved. You’re on to bigger and better things.

the kitchenening, part three

looking through a doorway and up towards the ceiling of a room under construction

Our kitchen has a ceiling! And it’s NOT STUCCO.

kitd3-2

Our living room is also getting a new not-stucco ceiling as part of this job. We found out when the ceiling came down that there’s no subfloor upstairs, just beams with a floor on top and a ceiling below and a bunch of empty space in between, which explains a lot re: privacy in this house. Here’s a buffer insulation being put in so that you’ll soon be able to visit us and go upstairs to the washroom safe in the knowledge that nobody in the living room can hear you pee.

kitd3-3

Cozifying.

the cozy wozy

A nine-patch quilt square of blue and gray hand printed fabrics.

This past month I’ve been working on my first ever full size quilt, made from cotton muslin fabric I printed and dyed over the past few years while learning about indigo. It’s a snowball style, inspired by a beautiful orange and black quilt that I love made by Sarah Gagnon (link: Pelican Quilts). I like the simple square block with its tiny counterchanged corners. My gray fabrics are printed with leaf tannins and with rusty objects, and dyed with different combinations of tannins (walnut, myrobalan, gallnut) and iron water made by slowly dissolving a cast iron skillet in diluted vinegar. The blues are all of those things overdyed with indigo, plus some of my screenprints overdyed with indigo (some straight and some in combination with red iron oxide).

After weeks of making the squares with the tiny corners, and after soliciting advice from my quilt artist friend Lisa (link: asil) for how to start putting them together, the blocks came together fairly quickly and the final assembly of 4×5 nine-patch blocks took only a day. Here it is all laid out ready to be basted.

A blue and gray checkerboard quilt laid out on a floor.

And here’s the back, cobbled together from whatever pieces of the same fabric I had left. I got lucky and still had pieces of every major colour from the front: screenprint, printed walnut and maple leaves, rust marks, and pale indigo on top of a piece I had used as a screenprinting dropsheet.

The back of a quilt, composed of large blocks of blue and gray fabrics, laid out on a floor.

Good news: it already meets the approval of our household’s most discerning seeker of coziness.

A tortoiseshell cat lying on a blue and gray quilt laid out on a floor, with a cone of white thread and a tiny pair of red embroidery scissors in the foreground.

Here’s the part that’s going to take forever. I’m quilting this with a fairly large stitch and sashiko thread so it really shows, half a centimetre in from the edge of each large square, in order to really accentuate those counterchanged diamonds at the corners. You’ll notice that I took absolutely no care in making the corners consistent, and I love how janky some of them are. Precision isn’t really all that important to me in quilting, and as long as the 90° corners of the little triangles line up well (most are bang on, and those that aren’t are very close) then I don’t really care how out of whack the other corners are. A good thing, because some of them are extremely out of whack.

I’ve started quilting in the centre with navy blue thread. As it moves outward it’ll shift to a lighter blue dyed with walnut and indigo, then to a paler one dyed just with walnut, for what I hope will be a subtle pixelated sunburst effect.

Closeup of a blue and gray quilt, with quilting in progress and a pair of red embroidery scissors.

the prekitchenening

After we gained a beautiful new dining room as part of the addition put on our house in winter 2019/20, our old dining room became a storage space housing, among other things, our 2,000+ vinyl records in makeshift, temporary shelving. We’d talked for more than 10 years about making a wall of built in shelving to hold these, and with the room demo looming this huge job that felt totally beyond our capabilities suddenly became our top priority.

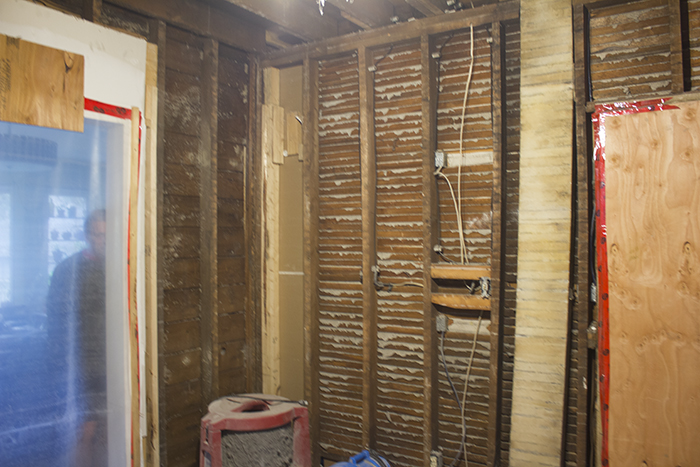
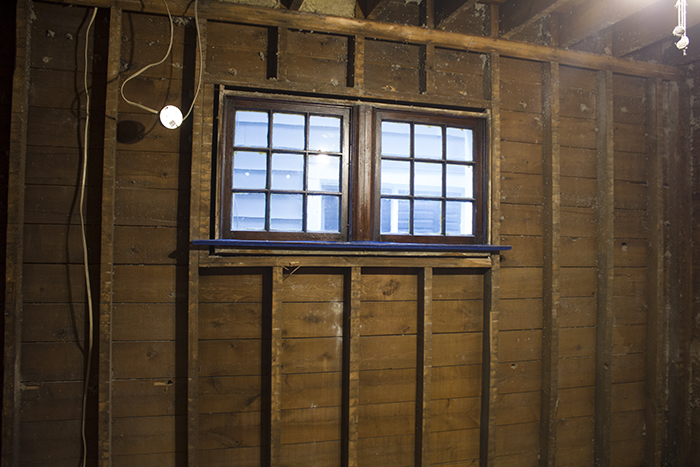
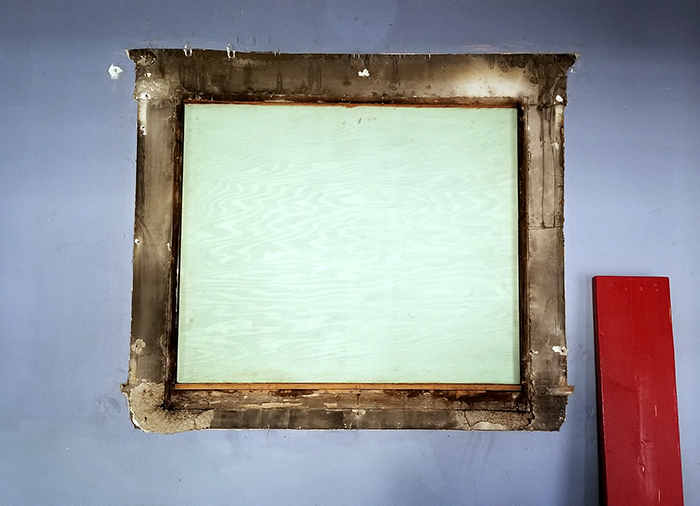
This original window in our front room was covered by a mirror on the inside, and by siding on the outside, long before we bought the house. Last winter and spring Peter removed the mirror (and the intact original window!), removed and saved the original trim, filled the hole with wood and insulation, and put a layer of drywall compound over it all, and then we finally painted over this hideous cornflower blue paint that we hadn’t bothered to deal with in the 20 years we’ve been in this house.

records00

We didn’t really know anything about how to build such a large project, but I got a load of advice from my friend Steve, who helped me to refine my design for ultimate sturdiness, and introduced me to Miller’s Millwork and Hardware so that I was able to just send in my cut list and have all the wood cut for me. This is definitely the part of the job we would have screwed up had we tried to do it ourselves.

Once the wood was cut the rest came together fairly easily, albeit slowly.

records01

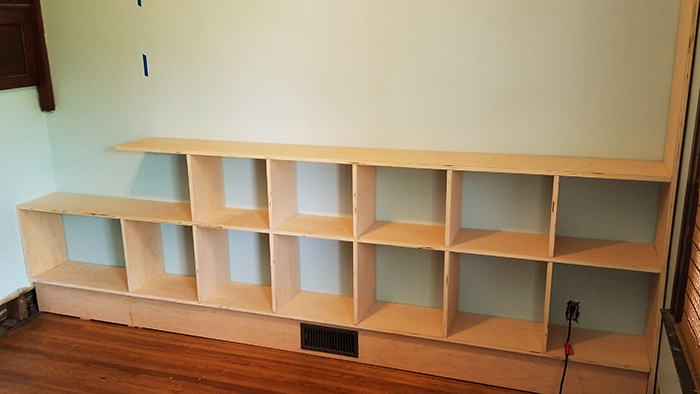
We leveled every single piece. Tedious!

records02

records03

Just look at that nice tight fit.

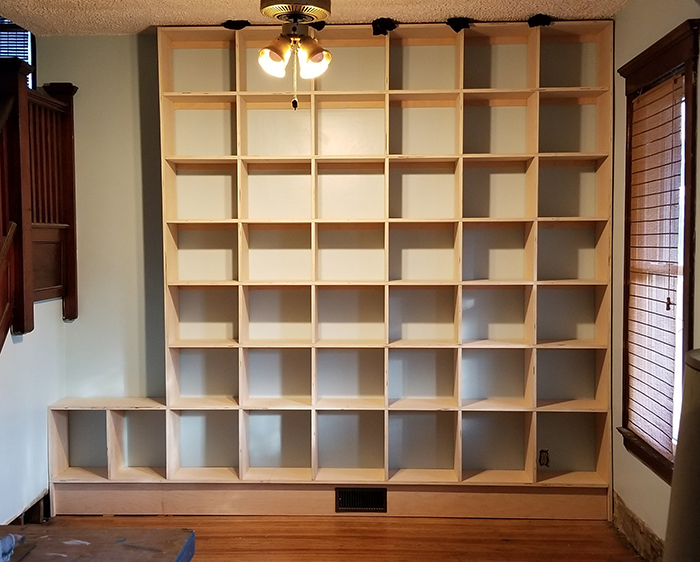
We left that gap at the side to avoid having to figure out an elegant way to butt this up against the trim at the stairs landing. Our original plan was to install a midcentury style pole lamp in this space. This may not happen for a while, but I have a pretty cool hanging lamp I’m going to put there in the meantime.

records04

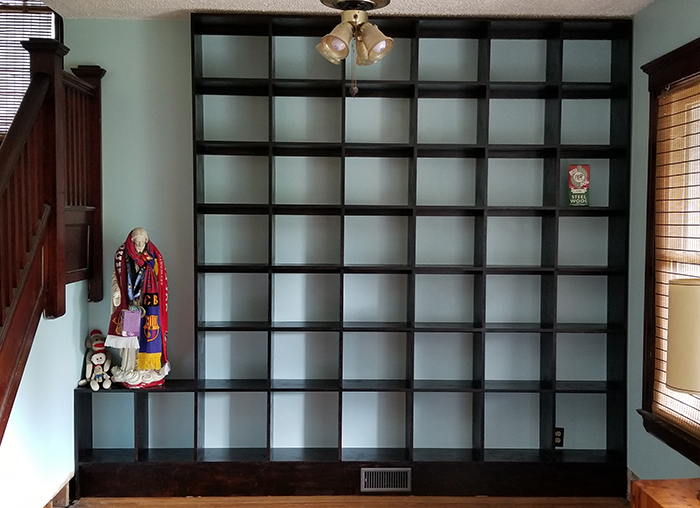
It took me more than a day just to tape out all these little boxes for staining.

records05

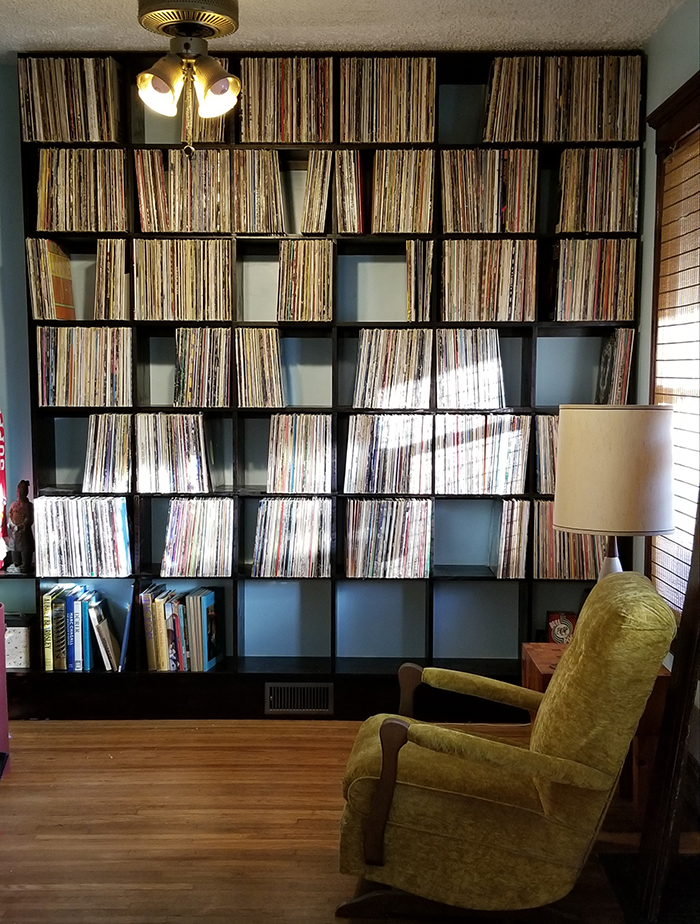
Let’s just have a moment of appreciation for the beautiful baby blue and pale yellow we decided on for this room, and how great it looks with the reddish tone of the original trim. Eventually the yellow will continue up the stairs and into the upstairs hallway.

records06

The whole project took us about a month, and in the final stages we spent a lot of time pausing while heading up or down the stairs and gazing on our handiwork with wonder. To be honest, three months later I’m still doing that probably once a day at least.

Here it is all full of records, 2300 in total, with room for about 1300 more.

records07

the kitchenening, part two

kitd2-3

Farewell, fake brick!

kitd2-1

See you later, stucco.

kitd2-2

Once upon a time, when this was our dining room, my entire collection of 1960s and 70s scouring-pad-holding ceramic frogs all fit on that windowsill. Now I have about three times that many, packed away in boxes, and after the kitchen is finished this windowsill will have to be CURATED. Hah.

kitd2-4

There’s something about this view that’s incredibly pleasing to me, but I’ll have to try not to get used to it, because soon this doorway will be naught but a window over the counter. Ah well, everything dies.